Using wood for bathroom walls can instantly elevate your bathroom, adding warmth, texture, and a natural, spa-like feel. However, bathrooms are high-moisture areas, and without proper care, wood can warp, swell, or develop mold. The key is to choose the right materials, install them correctly, and maintain them diligently. Here’s a comprehensive guide on how to enjoy Wood for bathroom walls safely and beautifully.
Why Wood for Bathroom Walls Needs Special Care
Bathrooms are among the most humid rooms in a home. The combination of hot showers, condensation, and limited airflow makes improper installation of wood for bathroom walls risky. Without moisture protection, even high-quality wood can suffer damage over time, losing both function and aesthetic appeal.
Natural Beauty and Warmth
Despite the challenges, wood for bathroom walls brings unmatched warmth and character. It balances the coldness of tile and stone, creating a cozy, inviting space.
Acoustic and Spa-Like Benefits
Wood naturally absorbs sound, making bathrooms quieter and more peaceful. Using wood for bathroom walls in combination with acoustic panels enhances both comfort and style.
Choosing the Right Wood
Selecting the correct type of wood is the first step in preventing damage. Not all woods perform well in humid conditions, so consider moisture-resistant varieties.
Teak
Teak is highly water-resistant due to its natural oils. It’s ideal for wood for bathroom walls, providing longevity and a rich, luxurious appearance.
Cedar
Cedar is naturally resistant to mold and mildew, making it perfect for wood for bathroom walls in high-humidity environments. Its pleasant aroma is an added bonus.
Engineered Wood Panels
Engineered panels are designed specifically for moisture-prone areas. Using engineered wood for bathroom walls reduces the risk of warping or swelling, combining beauty and practicality.
Preparing Wood for Bathroom Walls
Proper preparation ensures durability and prevents damage over time.
Sealing the Wood
Apply high-quality sealants like polyurethane, marine-grade varnish, or oil-based finishes to create a protective barrier. Well-sealed wood for bathroom walls resists water absorption and staining.
Moisture Barriers
Installing a moisture barrier behind the wood adds an extra layer of protection. This step is crucial for preventing mold growth and maintaining the integrity of wood for bathroom walls.
Acclimatizing the Wood
Before installation, allow the wood to acclimate to the bathroom’s temperature and humidity. This reduces the risk of expansion or contraction after installation.
Installation Tips for Damage-Free Wood
Correct installation is essential to preserve wood for bathroom walls.
Proper Ventilation
Ensure the bathroom has adequate ventilation through exhaust fans or windows. This keeps humidity levels low and protects your wood for bathroom walls from moisture buildup.
Spacing and Expansion Gaps
Leave small gaps between panels to allow natural expansion and contraction. This prevents warping or cracking over time.
Using Waterproof Adhesives and Fasteners
Select adhesives and fasteners designed for wet environments. These products help secure wood for bathroom walls without compromising durability.
Maintenance Tips for Long-Lasting Wood
Even with proper installation, regular maintenance ensures your wood for bathroom walls stay beautiful for years.
Regular Cleaning
Use a soft cloth and mild, non-abrasive cleaners. Avoid harsh chemicals that can strip the protective sealant from wood for bathroom walls.
Reapply Sealant Periodically
Over time, sealants can wear off. Inspect the wood every year and reapply a protective finish as needed to maintain resistance to moisture.
Monitor for Moisture and Mold
Check for signs of water damage, discoloration, or mold. Early detection allows you to treat any issues before they affect the entire wood for bathroom walls installation.
Design Ideas to Maximize Durability
Half-Wall Paneling
Using wood for bathroom walls on the lower half and tiles on the upper half reduces exposure to direct moisture while adding warmth and texture.
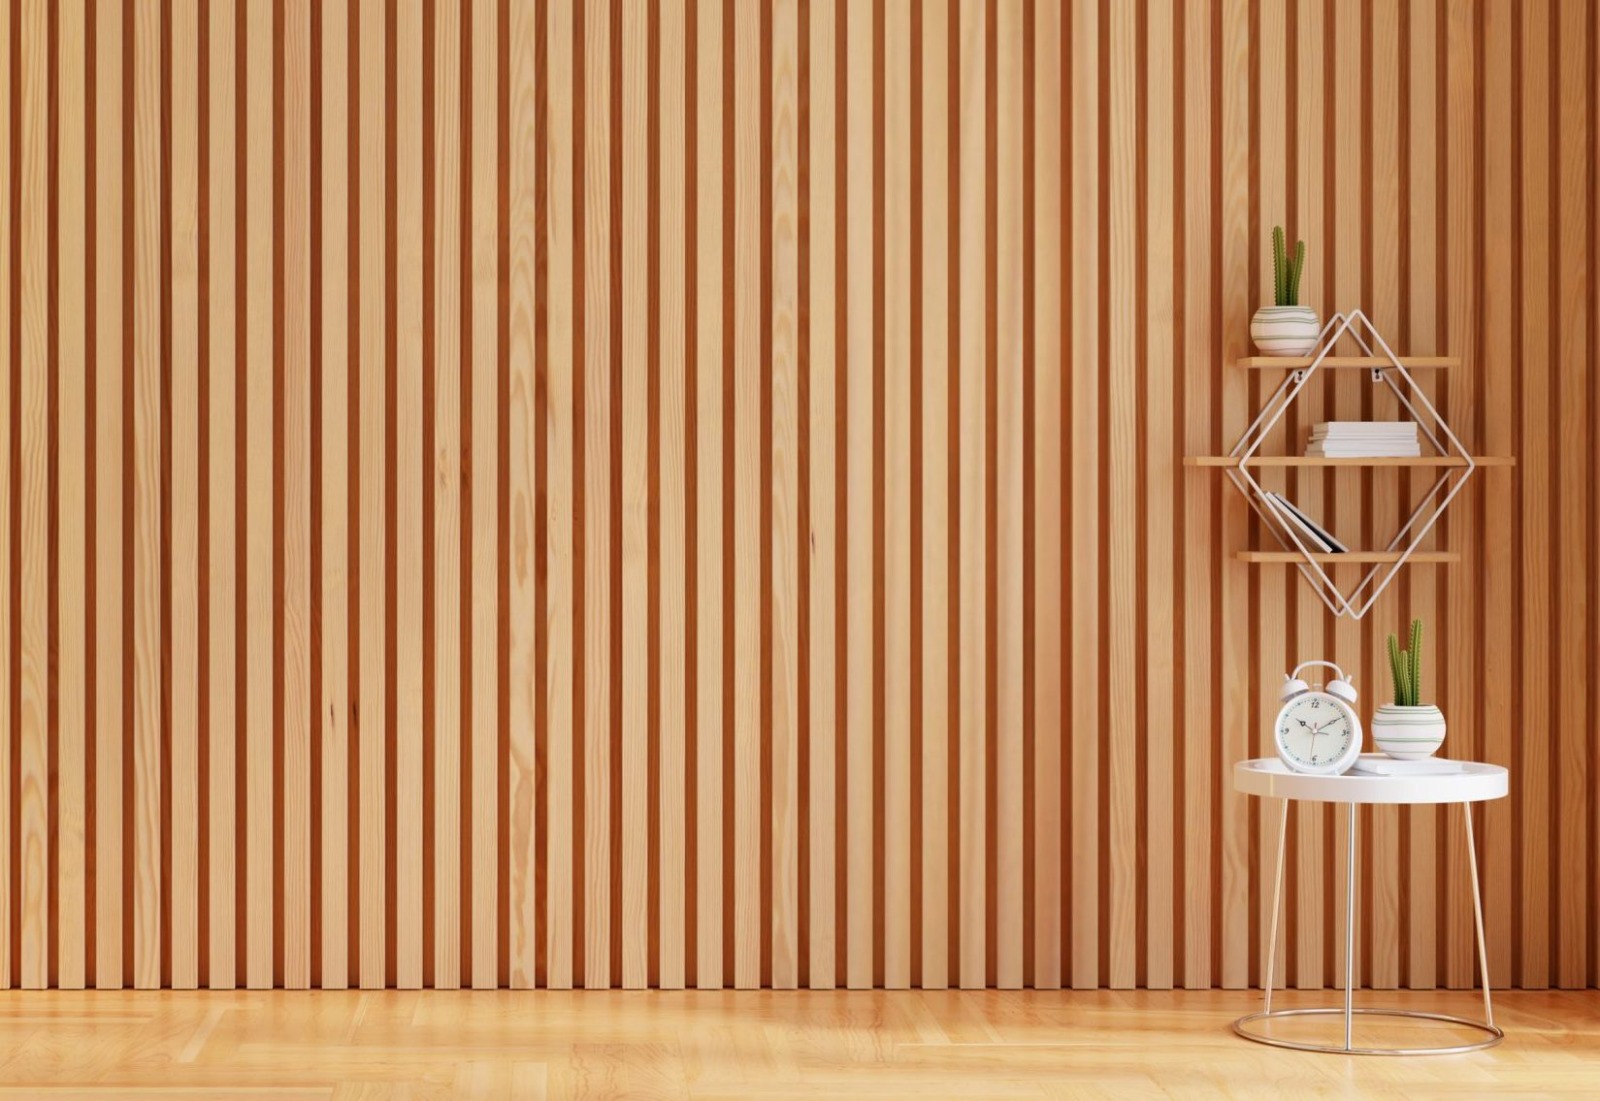
Slatted Wood Panels
Slatted designs enhance ventilation, allowing the wood to breathe. Slatted wood for bathroom walls also improves acoustics and adds a contemporary style.
Feature Walls
Create a single accent wall with wood for bathroom walls. This reduces overall exposure to moisture while providing a stunning visual focal point.
Conclusion
Using wood for bathroom walls doesn’t have to be risky. By selecting moisture-resistant wood, properly sealing and preparing it, and maintaining it regularly, you can enjoy the warmth, beauty, and acoustic benefits of wood without worry. With thoughtful design and installation, wood for bathroom walls can transform any bathroom into a stylish, spa-like retreat that lasts for years. Proper care is the key to combining natural elegance with long-term durability.